UPDATE: I've published a live version of this page so you can see the output and play with it live. You can find it at http://webinar-developer-edition.na1.force.com/projects
I recently created a Visualforce page that allowed users to manage projects. Rather than have the standard salesforce workflow of "click to detail screen" I wanted to have everything happen on the one page. After some experimentation I came up with an in-place editing design that I was pretty happy with in terms of user experience and also simplicity of implementation. I figured others might want to use something like this so I'm sharing it here.
First, let's look at the end result. This is what the page looks like:
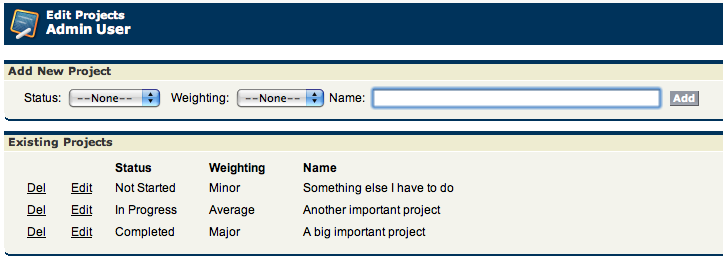
If I click 'Edit' next to the "Another important project" record, I get this:

At this point I can make changes to either of the drop-downs or the text input and either click Save to commit the changes or Cancel to discard them. In either case I'm brought back a view like the first screenshot with the updated values. Here's how the edit works:
The Edit link is a commandLink that calls a method on my controller passing in the current record's ID. When this method is called my controller code simply fills in an editProject sObject variable on my controller. If this editProject variable is null, nothing is being edited. If it's not null, then it represents the record being edited. Simple right?
Because that controller method returns null, the current page is re-evaluated again (UPDATE: As Jason points out in the comments, you can use rerender to only re-render the table as opposed to the whole page so I've made that update in the code). Within the page, I've got logic that determines whether to show the output controls or the input controls, based on that editProject variable. Within my table there are two versions of the row: I use an outputPanel element to represent each. I use an expression for the rendered attribute of each of them to determine which of the two to show. The expression simply tests if the current record's ID is equal to the editProject's ID and if so, it shows the input controls, otherwise it shows the output controls. Then the Edit link switches to a Save link which simply calls UPDATE on that editProject variable, picking up the new values. Voila!
The full code for both the visualforce page and the custom controller can be found here. By looking at this code you can check out the way I implemented the Add and Del links as well.
Let me know in the comments if you find this useful.